Water is the most precious resource on our planet. And it has many essential functions in supporting human life.
From drinking everyday to planting trees everything needs water. But beyond its essential functions, water is also an excellent experimenting tool for students.
Water has unique properties that make it perfect for learning science in fun, safe, and educational experiments. Students of all age groups can take part in science experiments with water.
Whether you are an educator seeking activities for the classroom or a parent wanting to nurture your child’s curiosity, simple science experiments with water are ideal.
These fun and engaging water experiments can transform learning into an exciting hands-on experience. It’s time to add some new activities such as science experiments for young scientists
Let’s explore top 15 science experiments with water for students to try at home or in school.
Also Read: science projects for kids rocks and minerals
Table of Contents
- 15 Science Experiments With Water For Students
- 1. Water cycle experiments
- 2. Walking water
- 3. Floating Orange Experiment
- 4. Lava Lamp
- 5. Saltwater Density Experiment
- 6. Water Temperature Experiments
- 7. Water Xylophone
- 8. Bottled Tornado Experiment
- 9. Make A Water Cycle Diagram
- 10. Underwater Candle
- 11. Bending of Light
- 12. Colorful Skittles
- 13. Volume Experiments
- 14. Water Density
- 15. Filtering Water
- Conclusion
15 Science Experiments With Water For Students

1. Water cycle experiments
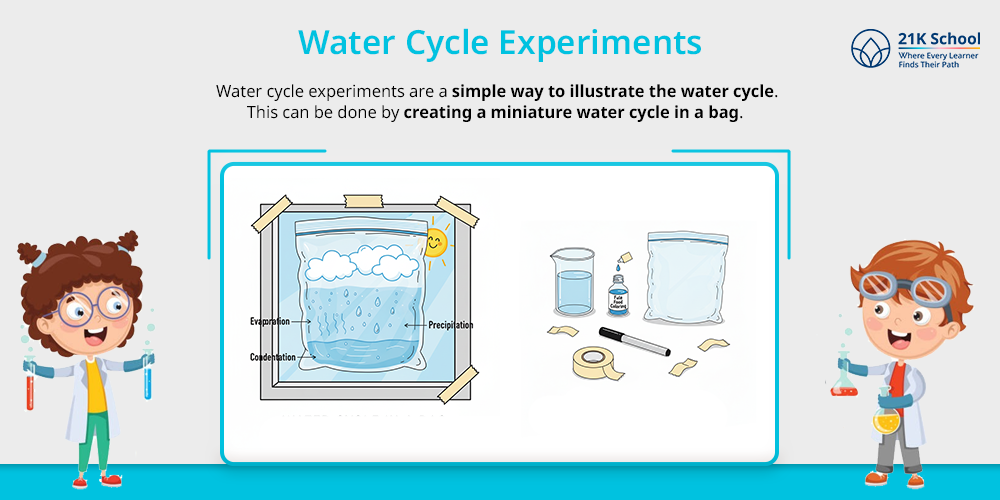
Water cycle experiments are a simple way to illustrate the water cycle. This can be done by creating a miniature water cycle in a bag.
It helps students in understanding the processes of evaporation, condensation, and precipitation.
Materials Needed: A large zip-lock bag, some water, blue food coloring, a permanent marker, and tape.
Procedure: Start with drawing the sun and clouds on the bag through markers. Then ddd a little water, blue food coloring into the bag and seal tightly.
Later tape it to a sunny window and observe the condensation and precipitation forming over time.
Scientific Principle: This experiment demonstrates the water cycle which includes evaporation, condensation and precipitation.
2. Walking water
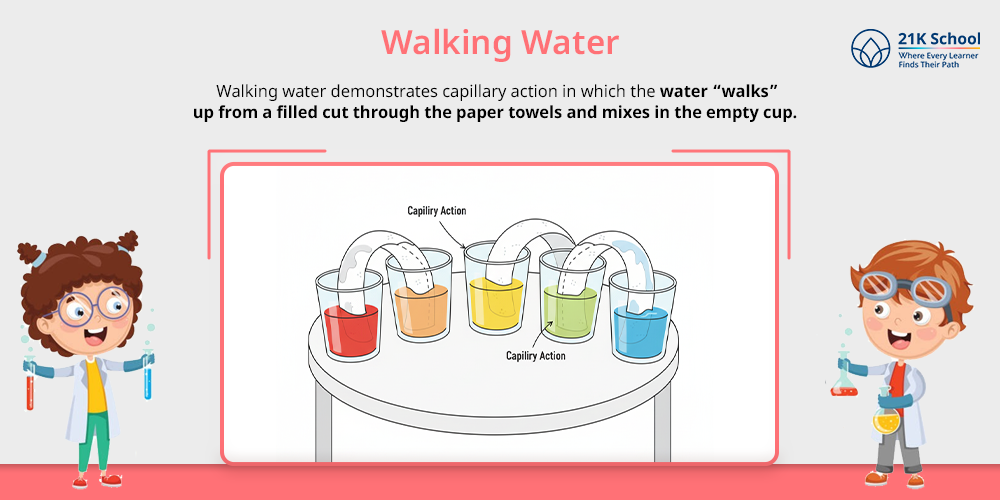
Walking water demonstrates capillary action in which the water “walks” up from a filled cut through the paper towels and mixes in the empty cup.
Materials Needed: 6 cups, water, assorted food coloring, and some paper towels.
Procedure: Fill alternate cups with water and add different food colors in each.
Then roll the paper towels and place one end into the cup with colored water and the other end into the empty cup. Watch how the water walks or travels towards the empty cups.
Scientific Principle: Capillary action helps water to travel upward through paper towels.
3. Floating Orange Experiment
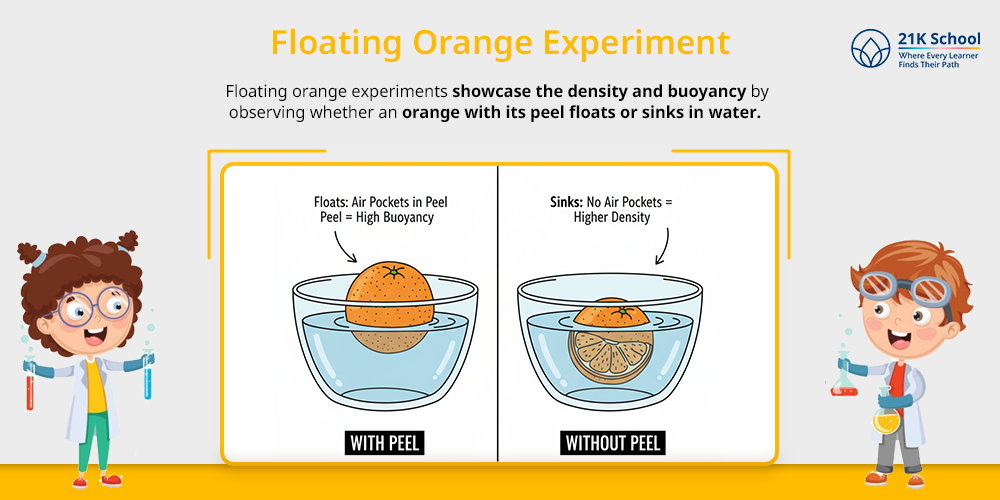
Floating orange experiments showcase the density and buoyancy by observing whether an orange with its peel floats or sinks in water.
Then students repeated the experiment with the peeled orange to see the difference.
Materials Needed: 1 orange with peel, 1 peeled orange, large bowl of water.
Procedure: Experiment starts by placing the unpeeled orange in water then it floats. Next, put the peeled orange into the water, it will sink in some time.
Scientific Principle: The experiment showcases that peel contains air pockets. This will increase buoyancy and allow the orange to float.
4. Lava Lamp
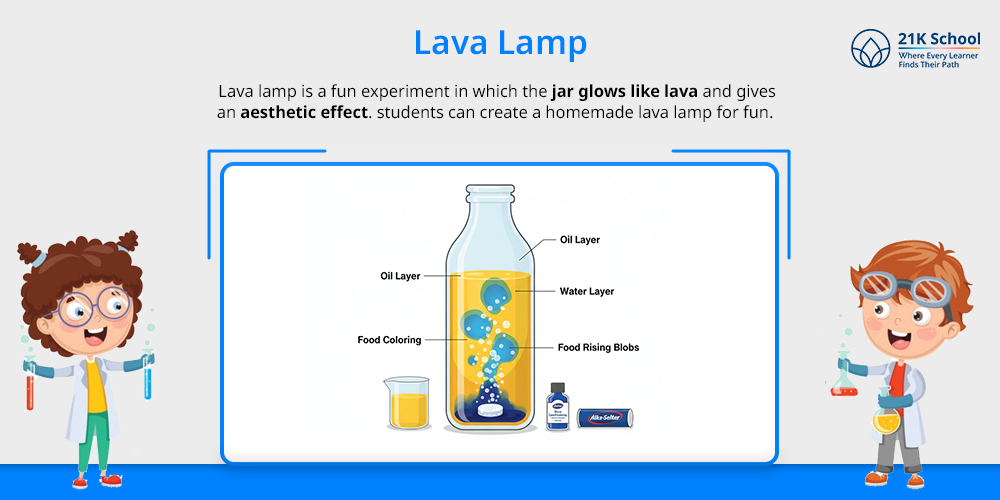
Lava lamp is a fun experiment in which the jar glows like lava and gives an aesthetic effect. students can create a homemade lava lamp for fun.
Materials Needed: A transparent bottle filled with water and vegetable oil, a few drops of food coloring, and an Alka-Seltzer tablet.
Procedure: The experiment starts with filling 3/4 of the bottle with oil. Then add water and later add food coloring. Drop an Alka-Seltzer tablet in solution and watch.
Scientific Principle: Due to density differences oil and water do not mix with each other. The tablet creates gas bubbles which cause movement.
5. Saltwater Density Experiment

A unique saltwater density experiment that works in adding salt to water increases its density, causing objects like eggs to float higher in saltwater than in freshwater.
Materials Needed: Two glasses, water, salt, egg.
Procedure: Gather all elements then fill both glasses with water. Then add some salt to one glass and stir. Gently drop the egg into both glasses and see magic.
Scientific Principle: This happens because salt increases water density which allows the egg to float on the surface.
6. Water Temperature Experiments
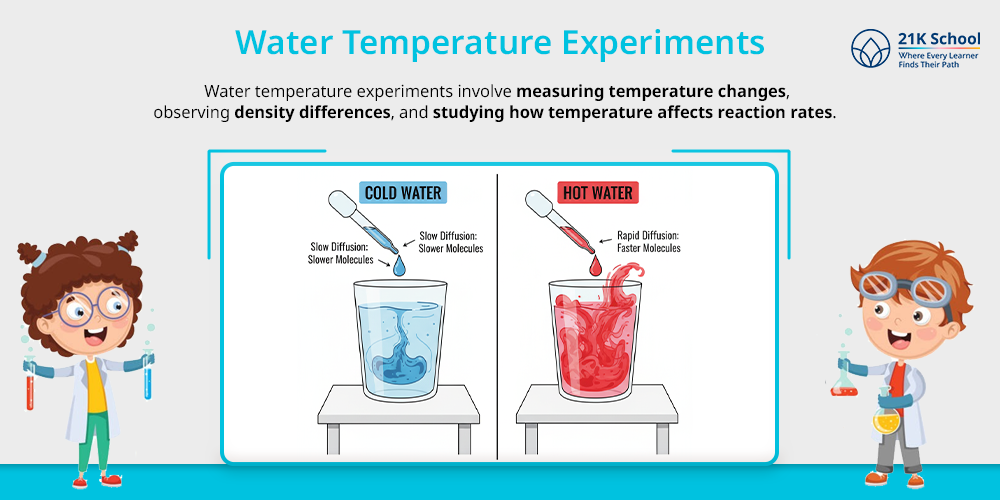
Water temperature experiments involve measuring temperature changes, observing density differences, and studying how temperature affects reaction rates.
With this experiment students learn about heat transfer, density, and reactions involving water at different temperatures.
Materials Needed: Clear cups, cold water, hot water, food coloring, eye dropper.
Procedure: Start with dropping food coloring into hot and cold water. Then observe the rate of diffusion instantly.
Scientific Principle: Molecules move faster in hot water, causing quicker mixing.
Read how you can engage your kid for science experiments for 4th class
7. Water Xylophone
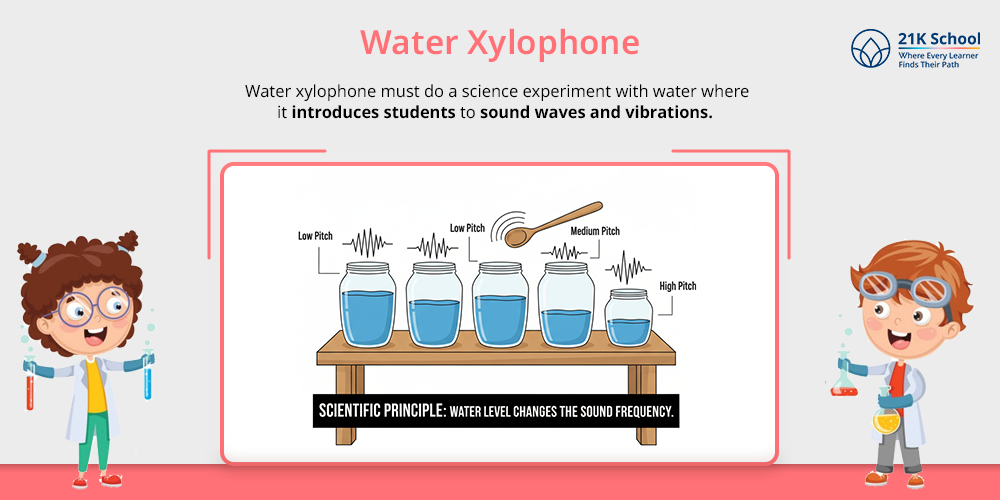
Water xylophone must do a science experiment with water where it introduces students to sound waves and vibrations.
Here’s how experiment takes place:
Materials Needed: Glasses or jars, water, spoon or stick.
Procedure: Experiment starts by filling glasses with varying amounts of water. Then tap with a spoon and listen to different pitches.
Scientific Principle: Here, water level changes the sound frequency that way exie.
8. Bottled Tornado Experiment

The tornado in the bottle is a science experiment created due to centripetal force. It means an inward-facing force that pulls an object or liquid toward the center of its circular path.
Explore the experiment through given experiment steps:
Materials Needed: Two-liter plastic bottles, water, washer or tornado tube connector, glitter for fun (it can be optional).
Procedure: kids fill one bottle with water and connect the empty bottle with the connector. Then flip it and swirl to create a tornado. It is fun and can be done by young kids.
Scientific Principle: Vortex formation happens due to angular momentum and centripetal force.
9. Make A Water Cycle Diagram
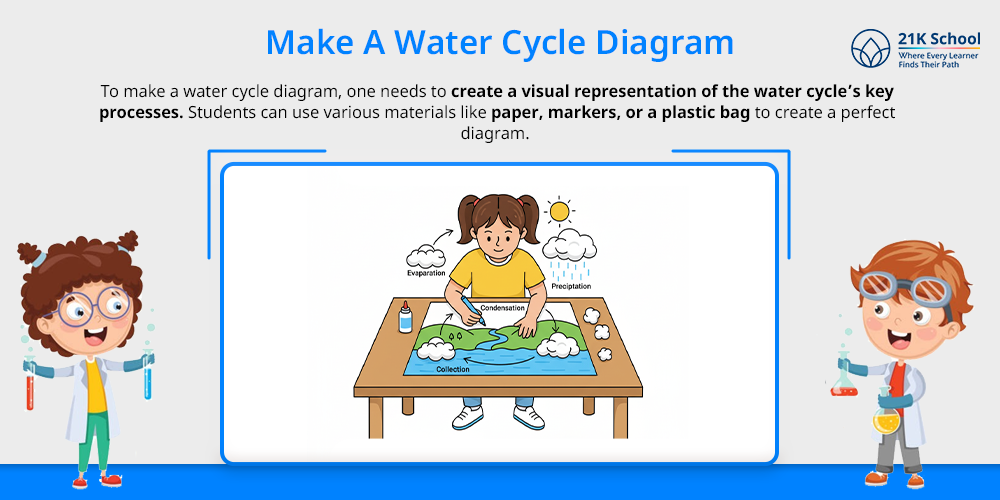
To make a water cycle diagram, one needs to create a visual representation of the water cycle’s key processes.
Students can use various materials like paper, markers, or a plastic bag to create a perfect diagram.
Materials Needed: Paper, markers, cotton balls, glue.
Procedure: Start with drawing the water cycle stages. Later use cotton balls for making clouds. Then, label each stage: evaporation, condensation, precipitation, and collection.
Scientific Principle: Students can visualise the continuous movement of water in nature.
10. Underwater Candle
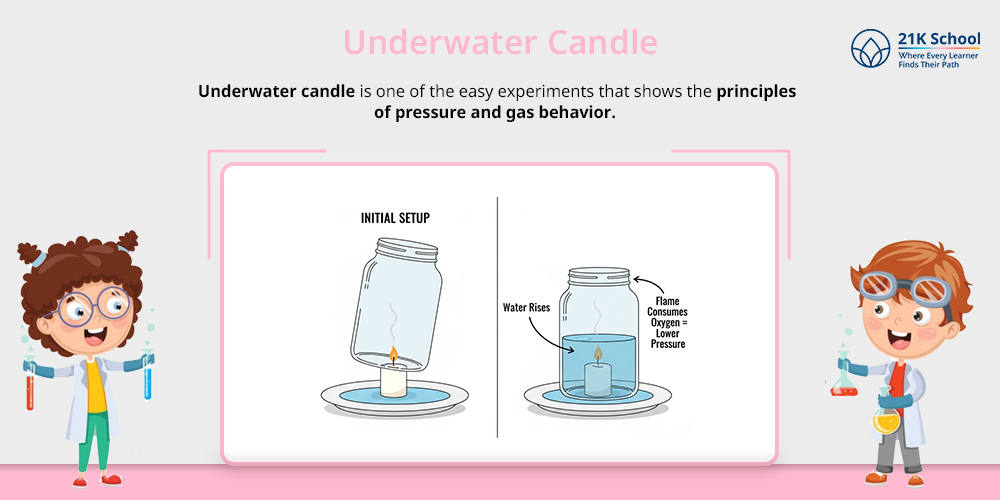
Underwater candle is one of the easy experiments that shows the principles of pressure and gas behavior.
With the guidance of elder students you can see how flame consumes oxygen and pressure building.
Materials Needed: Plate, candle, water, glass jar.
Procedure: The experiment begins with pouring water into the plate. Then light the candle and place it in the center point. Cover with the glass jar and see the result. The water rises inside the jar.
Scientific Principle: The experiment shows that the flame consumes oxygen, creating lower pressure and drawing water up.
11. Bending of Light
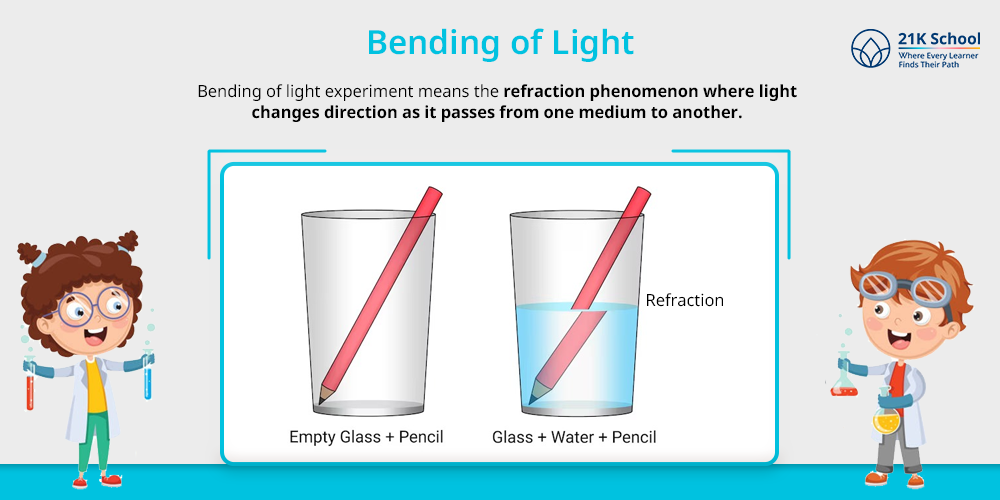
Bending of light experiment means the refraction phenomenon where light changes direction as it passes from one medium to another.
Students can perform this experiment by following the given steps.
Materials Needed: Glass of water and straw or pencil.
Procedure: Place the straw or pencil in water. Then view from the side and notice the bending in the glass showcasing refraction.
Scientific Principle: The experiment shows refraction. It occurs as light changes speed when moving through water.
12. Colorful Skittles
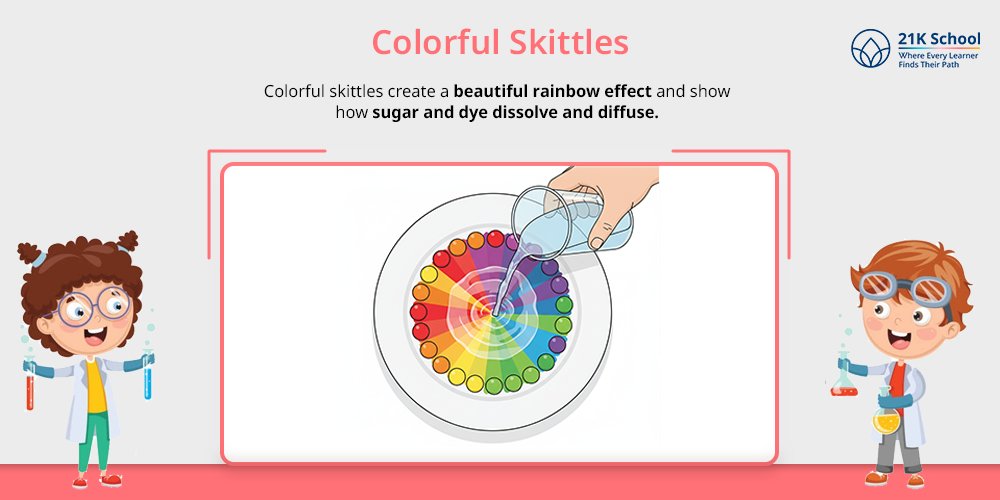
Colorful skittles create a beautiful rainbow effect and show how sugar and dye dissolve and diffuse. The experiment is ideal for young kids.
If your kid is also young or or in class one must read science experiments for class 1
Materials Needed: Skittles, plate and warm water.
Procedure: Arrange Skittles in a circle on a plate then pour warm water slowly and watch colors spread toward the center.
Scientific Principle: The sugar and color dissolve and diffuse in water.
13. Volume Experiments
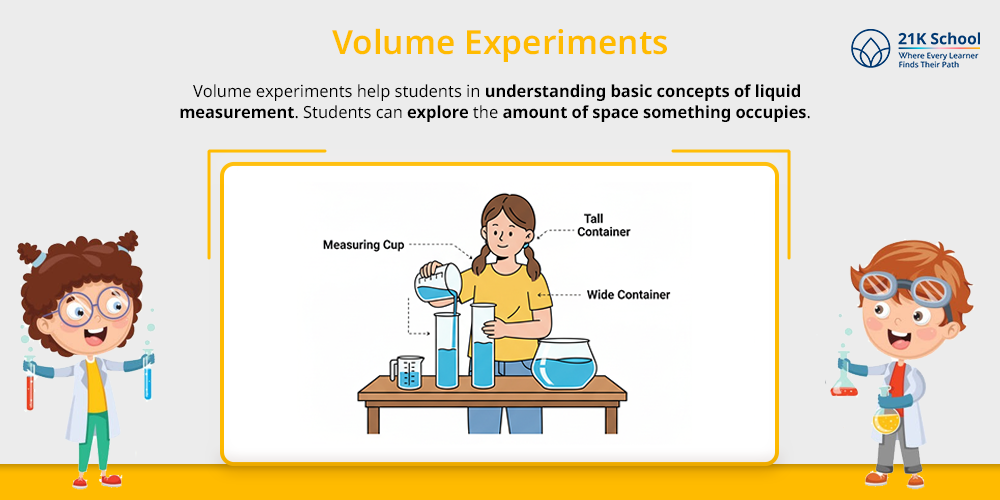
Volume experiments help students in understanding basic concepts of liquid measurement.
Students can explore the amount of space something occupies.
Materials Needed: Measuring cups, water and various containers.
Procedure: Pour water into different containers then measure and compare volumes.
Scientific Principle: The experiment demonstrates conservation of volume despite container shape differences.
14. Water Density
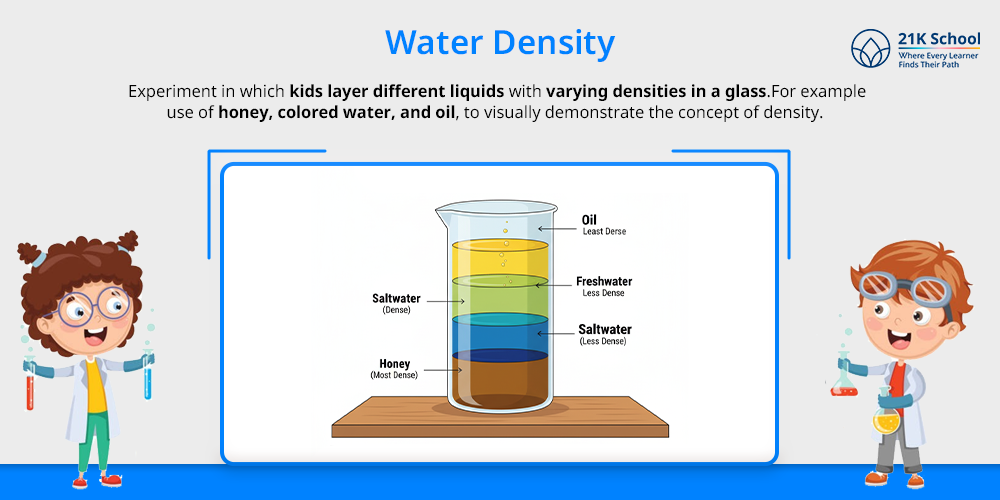
Experiment in which kids layer different liquids with varying densities in a glass.
For example use of honey, colored water, and oil, to visually demonstrate the concept of density.
Materials Needed: Food coloring, salt, water, clear containers and spoon.
Procedure: Start with mixing saltwater with food color. Then slowly pour freshwater on top and observe layers formed.
Scientific Principle: The experiment shows that the denser saltwater stays below lighter freshwater. It happens due to density differences.
15. Filtering Water
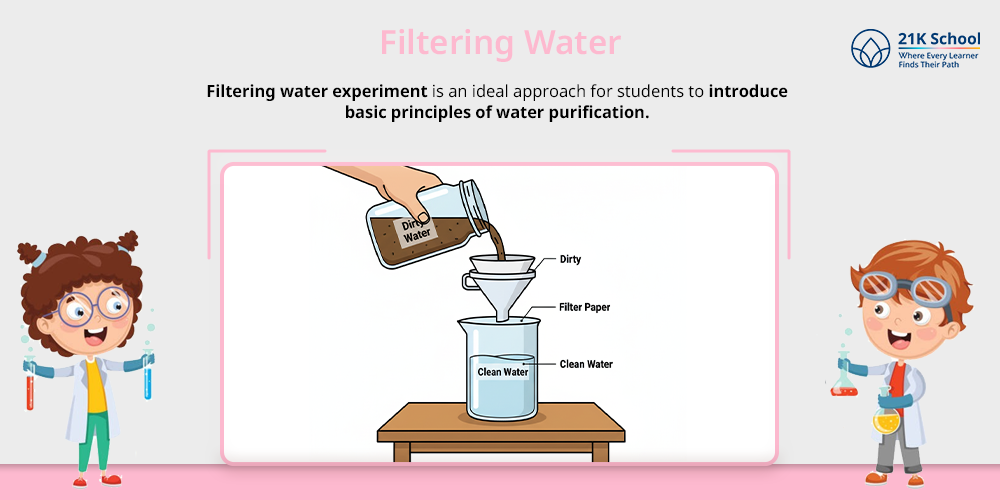
Filtering water experiment is an ideal approach for students to introduce basic principles of water purification.
Here is a step by step guide on how to do it both at home and school.
Materials Needed: Dirty or impure water, filter paper or coffee filter, funnel and clean container.
Procedure: Place the filter in the funnel and pour dirty water slowly. Then observe clean water collecting below in a container.
Scientific Principle: The experiment shows a filtration process where particles separated from liquid through physical barriers.
Also read: Science experiments for kids renewable energy
Conclusion
Above mentioned simple and educational science experiments with water are a fantastic way to introduce students to new concepts such as density, refraction etc.
Explore various crucial science experiment for class 3
These experiments stimulate curiosity and critical thinking in students and also demonstrate the unique properties of water in the right way.
Whether your child is in the classroom or at home, try these experiments for fun learning. It provides valuable opportunities for students to explore science through observation, experimentation, and fun. To know more follow 21K School

You may also want to read